

Designing a home music recording studio can take many forms, including mobile-friendly setups and pro-level rooms
In 2025, most tunes begin life on a phone or laptop. Guitarists don’t need a fancy live room to turn ideas into finished tracks—just a DAW app, a pair of earbuds or headphones, and a guitar plugged into a suitable interface. Meanwhile, home music studio design can take many forms.
Whether you’re laying down a throaty Gibson Les Paul™ riff or a delicate clean arpeggio, today’s in-the-box amplifier and microphone emulations deliver pro-caliber tone without ever touching a mic stand. Guitar World recently published a roundup review of the top plugin contenders for guitarists, noting that “the inherent versatility of a guitar amp plugin for practice or recording at home” is part of the central viability of those setups.
One thing you’ll probably want, since you’re reading this on a guitar-centric site, is a versatile instrument. The Les Paul Studio fits the bill and is built for contemporary musicians looking for a rich array of tones for recording. Available in a range of stunning gloss nitrocellulose lacquer finishes such as Ebony, Blueberry Burst, Wine Red, and Cherry Sunburst, there’s a Les Paul Studio ready to help every player achieve their musical goals.
Mat Koehler, Gibson Vice President of Products, recently told us, “For over 40 years, our Les Paul Studio models have been the sonic cornerstone on countless records, stages, and rehearsal spaces, offering players legendary Les Paul tones in an accessible way. As we reintroduce and expand the Les Paul Studio range with new features, we celebrate the value of quality tools in the hands of artists, and we look forward to new generations of players who champion them.”
So that’s the electric guitar sorted, then. Time to look at what else you need to build your dream home music studio.
Getting started with the basic needs for your creative space
Guitar in hand, carving out a dedicated space for home music recording has perquisites beyond just quality of sound—it fosters the right mood for bursts of fretboard creativity. A pared-down setup with your iPad or phone nearby is perfectly valid, too, so why not enjoy both? Check out KRK’s GoAux 4 monitors, which are perfect for mobile recording and getting set up for a hassle-free recording situation, wherever you are.
You may start your tune on the subway or in a passenger seat (please, not while driving—although steering wheels make excellent drums, don’t they?) and finish it in a space that’s really geared up for creativity and accuracy. I can’t remember where I heard it first, but the idea that “you can’t stop a determined thief” is accurate, and so is the idea that a determined musician is equally unstoppable. Don’t let your space, budget, gear, or lack of gear keep you from going forward. We have a series of ideas to try out when the well seems dry.
Designing a home music studio can be both exciting and challenging. Whether you’re a seasoned musician or a budding producer, having a dedicated space to create and record is ideal for both creativity and comfort. Let’s explore critical steps from a bird’s eye view on how to design a functional and inspiring home studio in full acknowledgment that you may be perfectly satisfied with a more mobile-friendly approach, or enjoy the flexibility of both options.
Why might you crave a tricked-out home studio?
A well-designed home studio allows you to produce high-quality music without the distractions of a shared or rented space. It provides a controlled environment for sound recording, mixing, and mastering, enabling you to work efficiently on your projects using advanced techniques. It is not just an acoustically special place but one in which the ambiance and interior design help you get into the mood to be creative. The key concept here is a “controlled environment.”
A personalized home studio is probably where you’ll engage your musical imagination more deeply than anywhere else on earth, so it’s essential to think it through so your compositions can be realized well. Much joy can be found in a space tailored to your specific needs. Budget and goals will rule the day, so don’t let perfection become the enemy of the good. Work with what you’ve got and make incremental upgrades as time and budget considerations allow.
Step one: Choose a great space for your home music studio
Location is crucial. Select a room that is quiet and isolated from external noise, if you can. Avoid spaces with thin walls or large windows, as they can let in unwanted sound. Ideally, a basement or a room away from street noise is good.
You may or may not have a lot of control over this if you’re using a spare bedroom or detached dwelling unit, but you can still do a lot to personalize it and control the outcome. Make the most of what you’ve got! It’s even possible to create a stunning mobile studio in a van or delivery truck.
When designing a home studio for guitarists, achieving balanced acoustics is crucial for accurate recording and monitoring. It’s essential not to over-dampen the space by covering every surface with thin absorptive materials like two-inch acoustic foam or carpeting. While these materials absorb highs and some midrange frequencies, they can make the room overly bass-heavy. Instead, it’s beneficial to incorporate a mix of reflective and diffusive elements alongside absorptive treatments, with the absorptive acoustic treatments focusing on broadband absorption and bass traps.
In smaller rooms, maintaining a balance between absorption and reflection becomes even more critical. Broadband absorption helps prevent the room from sounding overly dry, while still controlling unwanted reflections that can muddy recordings. By strategically placing absorptive panels at early reflection points and leaving some other surfaces reflective or diffusive, guitarists can create an environment that enhances clarity and fidelity without sacrificing natural acoustic qualities. This approach ensures that the home studio remains versatile for both recording and mixing, supporting a wide range of musical styles and production needs.
What do session pros in Nashville think about reverb and lively rooms?
Kirsten Mitchell, a member of the first violin section of the Nashville Symphony Orchestra since 1997 and an active Nashville session player, echoes our sentiments about versatility and ambience: “Having played in both home and professional studios, many home studios seem to have the goal of deadening the sound while the professional studios I’ve played in encourage a little bit of natural reverb. I’ve noticed that the absence of overtones in a common home studio setup can result in a dull, muffled string sound.
“I think it’s important to practice in a variety of acoustical settings, including a dry room, as it offers the string player good information under the ear about intonation and technique. I usually prefer a tiny bit of reverb; my favorite practice room has a wood floor and a slightly raised ceiling.”
Her observations bring to light a few salient points that apply to guitarists, too: dry rooms create an opportunity for extra experimentation with reverbs downstream in the production process and a stark listening opportunity to evaluate your own playing, but rooms with their own character may be just as rewarding.
What are the most important aspects of a home studio?
There are many opinions on what’s important in a studio situation. Way back in 1989, veteran American record producer, mixer, and engineer Joe Chiccarelli told Recording Magazine, “I think having a home studio and having limited technical resources is really invaluable. Or having to work with up-and-coming bands who haven’t really honed their songwriting or honed their sound. It’s good for you to be able to go in and spend time with them in rehearsal situations—help work out a guitar part so it doesn’t fight a keyboard part, help straighten out a drum rhythm so it makes the chorus groove a little more.”
The limitation he mentions invokes the well-worn adage, “Less is more.” Sometimes, that’s a fair point because it may force a player or a band into an unexpected creative thread and creatively surprising outcomes. The film Begin Again embodies this idea as the central characters and their musical pals find themselves inspired to record an entire album in various locations throughout New York City, including rooftops, alleys, and the subway. It may be a make-believe story, but it’s true to life in terms of how not having something forces you to dream up another way forward or how to do it without the most ideal gear. Indeed, fans of Bruce Springsteen’s seminal album Nebraska can testify to the power of a primitive recording setup.
Step two: Soundproofing in the colloquial sense and absolute sense
Soundproofing and acoustic treatment are two different things. Soundproofing is literally the process of designing, constructing, or modifying a structure to prevent outside noise from entering and to keep your music from disturbing others. To truly do it, you need an air-tight structure, lots of very heavy materials (atomic mass), and layers of heavy materials that are mechanically decoupled from one another.
In the absolute sense, it’s about truly limiting what sounds can enter and leave a space. But, through informal and imprecise usage, it’s probably the term people use most often to search for ways to make their recording space sound better. The semantic domain of the term is broadened, even if it’s not perfectly accurate by definition.
Unfortunately, some materials manufacturers and retailers misuse the term. Beware of inexpensive, lightweight products that claim to provide “soundproofing.” When properly utilized, some of them may be somewhat useful in terms of acoustic treatment that will make your room sound better, but they won’t prevent sounds from entering your room from outside or stop loud sounds made within the room from disturbing your neighbors.
How thick should a concrete wall be to attenuate 20 Hz?
For a concrete wall to effectively attenuate a 20 Hz sound wave, it typically needs to be at least 12 inches thick. This thickness helps reduce sound transmission due to the mass and density of the concrete, but even one foot of concrete won’t stop a 20 Hz sound wave from passing through it if it is loud enough. A 20 Hz sound wave is over 56 feet long, so even a one-foot-thick layer of dense concrete is insufficient to completely stop low frequencies if they’re loud. The mass law in acoustics states that doubling the mass of a barrier increases the sound transmission loss by approximately 6 dB. Since concrete is dense and heavy, increasing its thickness helps to block lower frequencies more effectively.
In practical applications, especially in environments where low-frequency noise is a concern (think industrial settings or music studios), concrete walls might be combined with other materials or methods (like adding damping layers, air gaps, or additional barriers) to enhance sound attenuation.
Since my budget is tight, what can I do to treat the in-room experience?
Attenuation can be partially achieved at some midrange and higher frequencies with absorption panels, thick curtains, and even carpets. These materials can also be beneficial for eliminating flutter echo and controlling early reflections. Furniture has an effect, too, and may positively limit bass frequencies. Consider adding bass traps in the corners of the room to help manage low-frequency sound waves within the room. You can even build DIY bass traps yourself with relatively affordable materials. Double-pane glass windows and solid-core doors with effective gaskets are also beneficial.
Nothing is going to work like mass and air gaps, so short of building a decoupled room within a room with extra layers of drywall and mass loaded vinyl, sounds are still going to travel in and out of the home studio space. The expense of that approach may be prohibitive, but you can do a lot to limit annoying flutter echoes within a typical bedroom and turn it into a more balanced sounding recording and monitoring environment on a budget.
Mitch Gallagher from Sweetwater notes that one great material to use for the panels is “stone wool.” This is also known as rockwool or compressed mineral wool, and like semi-rigid compressed fiberglass panels (such as Owens Corning type 703 and 705) these materials are useful for making DIY absorber panels.
It will always be a compromise to treat a room with multiple variables in play, including your budget and willingness to alter walls in your home at great expense and effort. Certainly, one can hire a professional who knows all the ins and outs of creating a more ideal recording space for musical scenarios. Expertise has great value, but you can learn a lot on your own and test out things until you hit the sweet spot or, at least, a super tolerable spot.
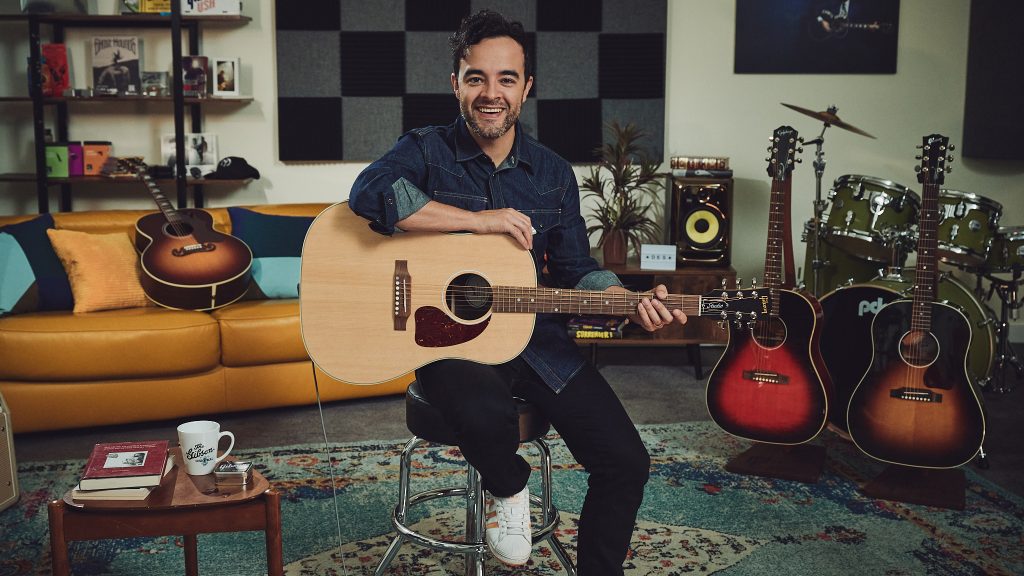
Image: Guitars on hangers or stands are handy, but be aware that they may vibrate in resonance with the sounds produced in the room—some producers employ this effect creatively, others want to minimize it entirely
Should I isolate the sound, try to contain it, or find a digital recording solution?
Various sound booths are available and may provide a desirable air gap if you intend to isolate a vocalist or instrument beyond the level that more superficial techniques offer. For acoustic drum sounds on a budget, consider today’s electronic kits that offer direct recording options and astonishing sample quality at any volume level you need.
For recording guitars, isolation cabs are passable when it comes to keeping the amp volume down in the room (and you can even make your own), but digital impulse responses (IRs) often sound much better. Not everyone is going to be able to build or design a proper control room with a separate live room, so a pragmatic approach like this may be the most affordable. The choices available now are astounding, and using that approach takes much of the room sound out of the equation—shifting the focus more toward monitoring a mix, and of course the performance.
If you are going amp-free, consider using DI boxes or high-impedance inputs on your audio interface and amp simulation plugins. Alternatively, if you swear by your tube amp, there are many products that offer attentuation, reactive speaker loads, and IRs in one handy box of tricks. These units enable you to use a cranked tube amp at significantly lower in-room volumes—or even silently. They also allow for direct recording without a microphone, using IRs to simulate the authentic sound of a speaker. For the best of both worlds, innovative modern amplifiers like the Mark VII from MESA/Boogie combine classic tube tone and feel with versatile onboard connectivity, variable power switching, cabinet simulations, and Internal Amp Load tech for cabinet-free use.
Even if you don’t realise it, you are listening to direct guitar sounds all the time; they are rushing through the airwaves all around us on hit records, from radio stations, and streaming playlists. But for those determined to push air, useful approaches include hooking a cabinet to the amp with a longer speaker cable and placing it either in a closet or another room entirely. It’ll come down to your specific needs, the layout of your space, and the availability of nearby rooms.
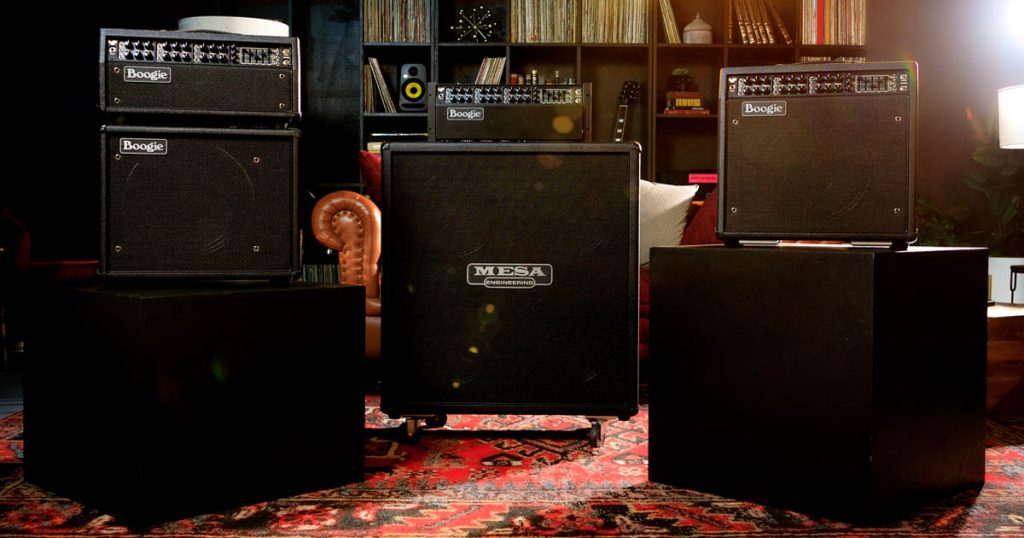
Image: The MESA/Boogie Mark VII comes with everything you need onboard to record professional guitar tones direct to your DAW
Step three: Acoustic treatment toward an ideal listening and recording environment
Acoustic treatment enhances sound quality within your studio. This involves managing sound reflections, echoes, and reverb. Use acoustic foam panels or DIY broadband absorbers on the walls, DIY bass traps in the room corners, diffusion panels on the ceiling and the rear wall of the room, and strategically placed furniture to absorb and diffuse sound.
The goal is to control unwanted resonances and early reflections and achieve a balanced sound within the room. Some KRK speakers even customize your perception in the room using voicing modes, helping you improve the balance of the monitoring in less-than-ideal monitoring situations.
Step four: Layout and design
The layout may facilitate workflow using principles of feng shui. Position your desk and equipment in a way that allows easy access to all tools. The monitor speakers should form an equilateral triangle with your listening position for accurate sound reproduction. Keep cables organized to prevent clutter. Plenty of rolling shelves are available, and these make organization much easier. The last thing you want to do is have to guess where patch cables are stored or where you keep batteries, battery chargers, and other tools.
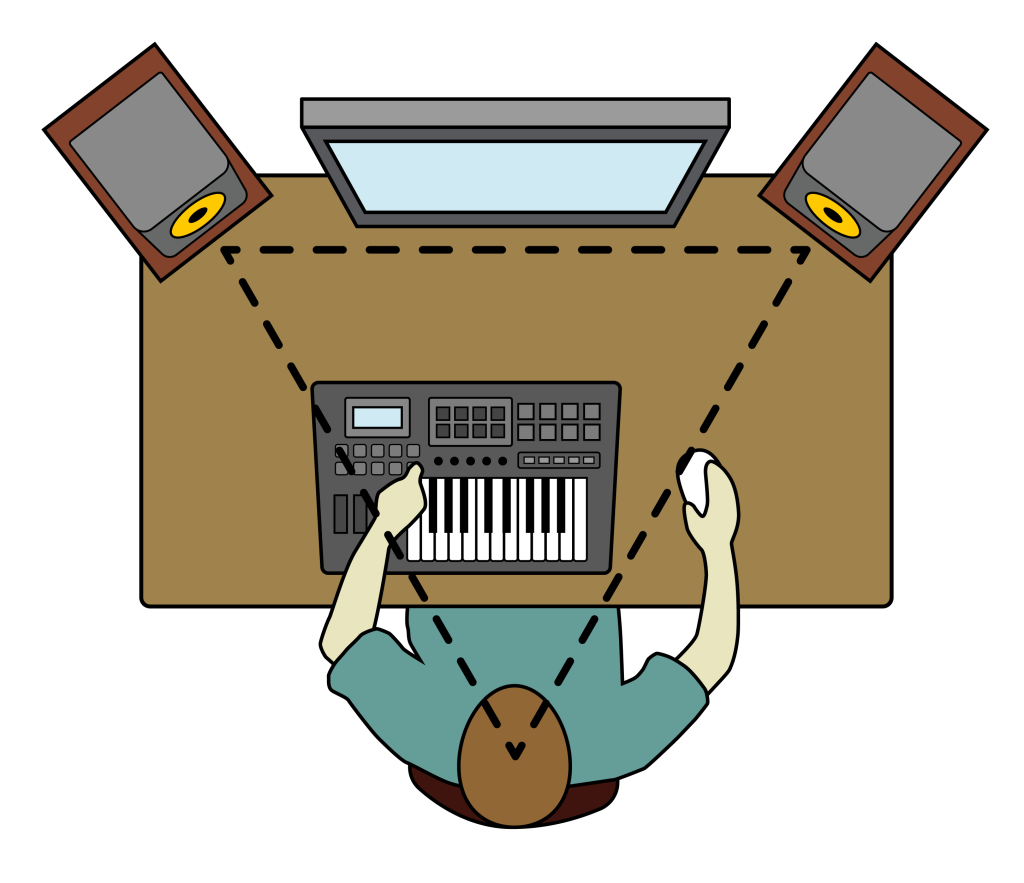
Image: Form an equilateral triangle with your monitors and ears
Here’s the real skinny on getting your monitors and seating idealized for production: Setting up your system correctly is crucial to minimize unwanted room acoustic effects. Natural acoustics can alter sound levels across different frequencies due to irregular damping or reflections. For optimal setup, follow these steps inspired by the KRK ROKIT 5 manual:
- Position your studio monitors and worktable in the front third of the room to reduce peak frequency reflections.
- Center the left and right sides of your setup equidistantly from the room’s walls to maintain balanced mid and low-frequency responses and preserve stereo imaging.
- Ensure your listening position (ears) is at least three feet (one meter) away from any wall and avoid placing large objects like lamps near studio monitors and the listening area.
- Use diffusers and absorption materials in room corners and the back to minimize reflections and room interaction.
- Carpeting can help dampen reflections from hard floor surfaces.
- Use studio monitor isolators (foam or rubber pads) to prevent low-frequency coupling between stands and desks, which can cause vibrations and unwanted noise.
- Maintain a low noise floor in your room to avoid external interference from appliances like refrigerators or fans, which can mask low-frequency details. Address any rattles caused by studio monitor playback promptly.
Secondary considerations to enhance the vibe and a few practical tips for feng shui in a music studio:
- Keep the space clean and organized: Clutter blocks creativity.
- Ensure good air quality: Open windows when possible or use air purifiers.
- Choose soothing colors: Greens, blues, and earth tones can create a calming atmosphere.
- Position your desk wisely: Avoid having your back to the door if you don’t like people sneaking up on you while you’re in deep concentration.
- Introduce practical aesthetic elements: Plants, stylish furniture, and a water dispenser as these niceties may enhance creativity.
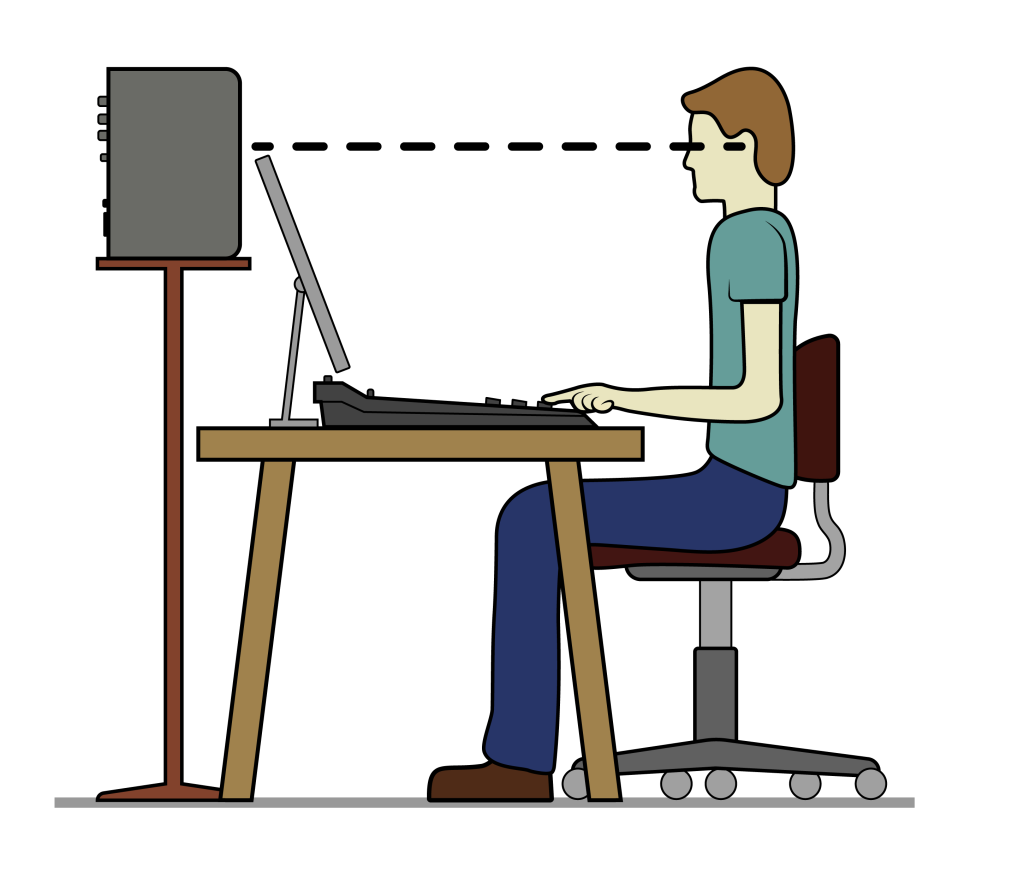
Image: Ensure your ears are in alignment with the monitors
Step five: Essential equipment
Invest in quality equipment that suits your music style. Ideally, you’ll need a computer, audio interface, studio monitors, a microphone, and headphones. Choose equipment that is reliable and fits your budget. Unless you are planning on mixing on headphones, good studio monitors are crucial, as every decision you make is based on what you hear and what the monitor speakers are telling you. If they are inaccurate, you won’t be able to make good decisions about the mix balance or the sounds you’re trying to record.
The free KRK Audio Tools app includes utilities that help you properly set up your monitors, regardless of brand. The Gibson App provides a tuner and metronome that will also be useful. For a limited time, when you purchase select acoustic and electric guitars, you’ll receive three free months of the Gibson App. Learn to play guitar at your own pace with some of the world’s best guitarists. Learn anywhere. Anytime. With any guitar. Shop now for the qualifying instruments.
Step six: Lighting and ambience
Create a space that inspires creativity. Good lighting is helpful—natural light is ideal, but if that’s not possible, use adjustable LED lights to set the mood. Personalize your studio with artwork, plants, or items that spark inspiration. Now is your chance to put those rockstar posters from your teen years back up. Plus, with decent lighting, you may have a chance of finding that headphone adapter that fell off the desk without using a flashlight!
Keep in mind that some black lights can introduce hum into your electrical system. Dimmer switches and internal components of laptops are notorious for creating 60-cycle hum, too.
Step seven: Testing and adjusting
Once your studio is set up, test it out. Play different types of music, especially music that you’re very familiar with, to check how the room handles sound. Make adjustments to your acoustic treatment or layout as needed to ensure the best sound quality. Also, if you can, invite a better set of ears into the room for another opinion.
Bringing it all together
Designing a home music studio is a blend of technical setup and creative space-making. By following these steps, you can create a studio that not only meets your technical needs but also fuels your passion for music creation.
How much does it cost to build a home studio?
Costs for a home studio design can vary widely depending on the quality of equipment and materials used. Basic setups start around $1,000, while professional-grade studios cost much more. The world is your oyster.
Do I need a large space for a home studio?
You do not necessarily need a large space for a home studio. Even a small room can be transformed into a functional home studio with proper planning and acoustic treatment. As previously suggested, you don’t even have to have a room at all. The right headphones can get you going in the right direction, allowing you to adapt to whatever environment you have at the time, and a laptop and audio interface-based setup will allow you to go mobile and record in whatever rooms you have access to, even outside of your home. Rehearsal studios, warehouses, your local church on a weeknight when it’s not in use—get creative, and lots of possibilities for interesting recording spaces may be available to you.
What’s the most important aspect of a home studio?
The most important aspect of a home studio is ultimately that it feels like a comfortable and creative space in which to explore your musical ideas with freedom. But, coming in at a close second, it’s hard to underestimate the importance of accurate monitoring. Acoustic treatment and soundproofing are crucial for ensuring high-quality sound recording and playback—or you are better off using high-quality headphones that you trust.
Designing a home studio in 2025 means blending mobility with ambition. Whether you’re tracking Les Paul riffs on your laptop or planning a full live-room overhaul, a thoughtful approach ensures you capture your best performances—every time.
Check out the full array of KRK studio tools, and get more information about the new Les Paul Studio and shop now.
